How to Reveal an Element on Scroll Down and Hide on Scroll Up with Elementor
Step 1: Add a Back to Top Button
To get started, open the Elementor editor. From the widget panel, find the Button widget and drag it onto your page. Don’t worry about where you place it initially—we’ll adjust its position later. For this example, we’ll place the button at the bottom of the page.
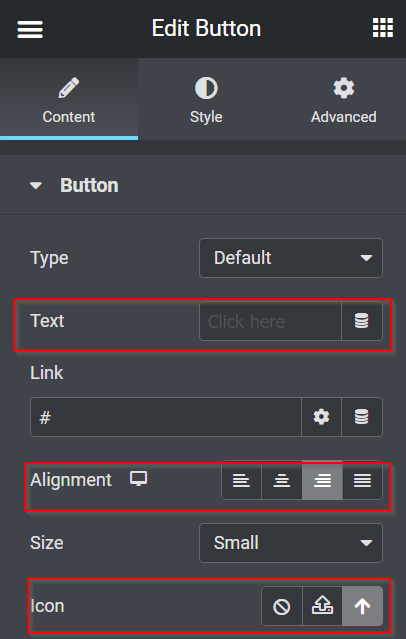
Next, head over to the settings panel and make the following adjustments:
Text: Remove the default text.
Alignment: Align the button to the right.
Icon: Choose the “Arrow Up” icon from the Icon Library.
That’s it! You’ve added your Back to Top button. Let’s move on to the next step.
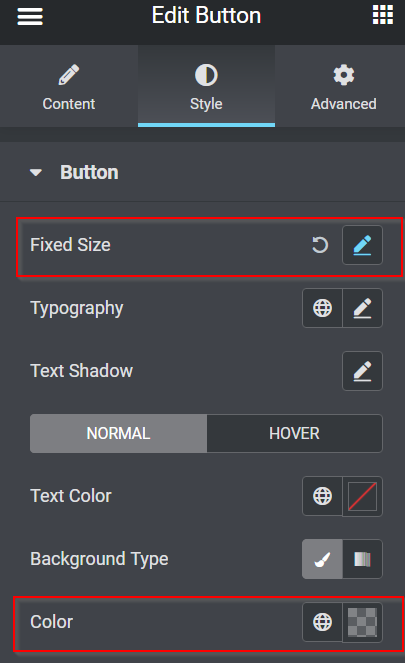
Style tab:
Fixed Position:
Height: 1
Width: 1
Background Color: #FFFFFF30
Advanced tab:
Position: Fixed
Horizontal Orientation: Right
Offset: 50 PX
Vertical Orientation: Bottom
Offset: 50 PX


Now, let’s make the button clickable. Head back to the Content tab in the settings panel and link the button to the top section of the page by filling in the Link field.
To do this, go to the top section of your page and click the Edit Section button. In the Advanced tab, locate the CSS ID field, add a unique ID name, and copy it. Once you’ve copied the CSS ID, return to the Edit Button settings, go to the Content tab, and paste the CSS ID into the Link field.
Now, whenever someone clicks the button, it will instantly take them to the top of the page, no matter where they are.
Step 2: Making the Back-to-Top Button Appear and Disappear
As you might have noticed in the GIF, the button works perfectly. However, it stays visible even when you’re at the top of the page, which doesn’t look ideal. To fix this, we’ll make the button disappear when you’re at the top of the page and reappear when you scroll down a bit. Let’s get started!
Adding JavaScript
To achieve this functionality, we’ll use a simple JavaScript snippet. Don’t worry, you don’t have to write any code – we’ve prepared it for you. All you need to do is copy and paste it.
Here’s how to add it:
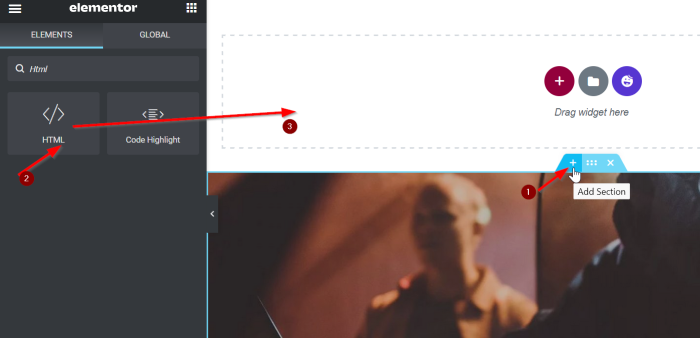
Create a new section by clicking the plus icon (+).
From the widget panel, select the HTML widget.
Drag and drop the widget into the canvas area.
In this example, we’ll place the HTML widget at the top section of the page. Let’s move on to adding the JavaScript!
					        <script src="https://code.jquery.com/jquery-3.6.0.min.js"></script>
    <script>
    var offset = 400
    $(window).on('load scroll', function(){

        if( $(window).scrollTop() > offset ){
            $('body').addClass('show')
        }else{
            $('body').removeClass('show')
        }
    })
    </script>

Custom CSS
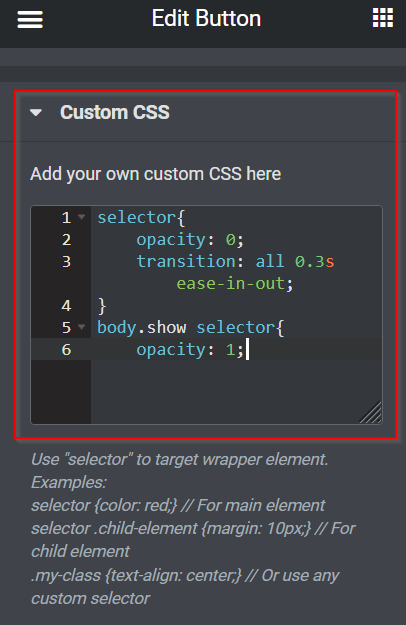
After adding the JavaScript snippet to the HTML field, go back to the Button widget settings. Under the Advanced tab, expand the Custom CSS section and paste the following CSS snippet:
					selector{
    opacity: 0;
    transition: all 0.3s ease-in-out;
}
body.show selector{
    opacity: 1;
}
How to Reveal a Floating Call to Action Button on Scroll Down and Hide on Scroll Up
To start, head over to your Elementor editor to either edit an existing page, post, or template, or create a fresh new one.
Step 1: Create Your Floating Call to Action Button
In Elementor, there are two ways to create a floating call-to-action button:
By adjusting the Z-Index
By using a popup
For this tutorial, we’ll focus on the first method, using Z-Index. If you’d like more details on creating floating buttons in Elementor, check out our article, “How to Create a Floating Button in Elementor.” Now, let’s dive in!
First, open up your Elementor editor. You can either edit an existing page or create a new one. For this tutorial, we’re editing an existing page. Start by adding a new section with just one column. Then, drag the Button widget from the panel to the canvas. From here, you can customize the button text and link. In this example, we’ll set the button link to take visitors to the Taylor Swift concert ticket sales page.
Step 2: Making the Floating Call to Action Button Appear and Disappear
As shown in the GIF above, the floating call to action button is visible at the top of the page. To make it disappear when you’re at the top, simply scroll down a bit, and the button will reappear. You can use the same method for hiding and revealing other elements like the Back to Top button.
Once you’re happy with the changes, don’t forget to click UPDATE or PUBLISH to save your work!
