
How to Fix WordPress Not Sending Email Issue
Step 1: Install the WP Mail SMTP Plugin
Regardless of the SMTP service you choose, you’ll need to have the WP Mail SMTP plugin installed on your site. This plugin allows you to switch from using the built-in PHP mail() function to your SMTP service.
First, install and activate the WP Mail SMTP plugin. For instructions, refer to our step-by-step guide on how to install a WordPress plugin.
Next, navigate to ‘WP Mail SMTP’ in your WordPress dashboard to configure the plugin settings. Begin by entering the name and email address you want to appear as the sender for your site’s emails.
Ensure this email address matches the one used for your SMTP service. You can choose to enforce this sender name and email address across your site, even if other plugins, like WPForms, have different settings. WP Mail SMTP will override these settings.
After configuring the sender details, select an SMTP mailing service for your site. In this tutorial, we’ll set up SMTP using SendLayer. To complete the WP Mail SMTP setup, create an account with SendLayer. Keep this tab open while you complete the registration, then return to finalize the setup in WP Mail SMTP.

Step 2: Set Up Your SMTP Mailing Service
SendLayer is a trusted email service provider that offers high deliverability for a large volume of emails.
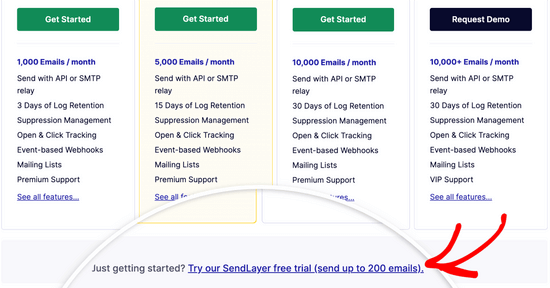
With SendLayer, you can send up to 200 emails for free, which is ideal for most small websites getting started. This includes emails from your contact form, new user account details, password recovery, and any other emails sent through your WordPress site.
To begin, visit the SendLayer website and create an account. On the Pricing page, click the ‘Try our SendLayer free trial (send up to 200 emails)’ link to register. After setting up your account, you’ll access your SendLayer dashboard.
Now that your SendLayer account is ready, let’s proceed with configuring your email provider in WordPress.
“Want to learn a new skill in graphic designing using Canva and more?
Unlock your creative potential with easy-to-follow tutorials and tips!
👉Click Here To Learn More to get started today
Plus, when you make a purchase through our link, you support us in bringing you more valuable content. Let’s grow together!”
Note: 👉Click Here To Learn More”
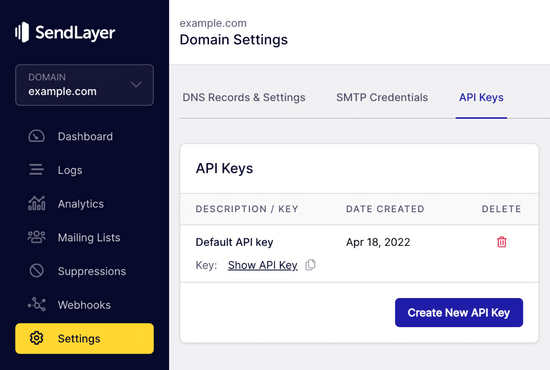
Step 3: Connect Your WordPress Website with SendLayer
Before you can use SendLayer to send emails, you need to authorize your domain. This process confirms to email servers that you own the domain and that your emails are coming from a legitimate source.
To authorize your domain, follow these steps:
Add Your Domain: From the SendLayer dashboard, click the orange ‘Add Domain’ button. Enter your domain name in the provided field and click ‘Add Domain.’
Get DNS Records: SendLayer will then provide you with five DNS records that need to be added to your domain’s DNS settings. These records allow SendLayer to verify your domain.
Add DNS Records: Log in to your WordPress hosting account. For this example, we’ll use Bluehost, but if you’re using a different host or domain registrar, follow their instructions.
In Bluehost, go to ‘Domains’ and click ‘Settings’ next to the domain you want to connect with SendLayer.
Scroll down to the ‘Advanced Tools’ section and click ‘Manage’ next to Advanced DNS Records.
You may see a warning about editing DNS records—ignore this, as the process is straightforward. Click ‘Continue.’
Enter Records: Click the ‘+ Add Record’ button to start adding the DNS records provided by SendLayer.
For CNAME Records:
Select ‘CNAME’ for the record type.
In the ‘Refers to’ section, choose ‘Other Host’ (this option will be used for all DNS records).
Fill in the fields: Host Name with the value from SendLayer’s ‘Hostname,’ Alias with the value from ‘Value,’ and TTL can be set to 15 minutes.
Click ‘Add’ to save the record.
For TXT Records:
Select ‘TXT’ for the record type.
Paste the ‘Hostname’ from SendLayer into the ‘Host Name’ field and the ‘Value’ into the ‘TXT Value’ field.
Verify DNS Records: After adding all records, return to SendLayer and check the box next to ‘I have added these DNS records and am ready to proceed.’ Click ‘Verify DNS Records.’
Note that verification might take 24-48 hours, though it often happens faster. If verification fails, try checking back later by navigating to ‘Settings’ and then ‘DNS Records & Settings’ in your SendLayer dashboard. You’ll see the status of your DNS records there.
Once the domain is successfully authorized, you’ll see green checkmarks next to each DNS record. Continue with the tutorial while you wait for the authorization to complete.

“Want to learn a new skill in graphic designing using Canva and more?
Unlock your creative potential with easy-to-follow tutorials and tips!
👉Click Here To Learn More to get started today
Plus, when you make a purchase through our link, you support us in bringing you more valuable content. Let’s grow together!”
Note: 👉Click Here To Learn More”