Comments Off on Elementor Zoom Image Quickly & Easily
Elementor Zoom Image Quickly & Easily
Method 1: Elementor Image zoom with overflow
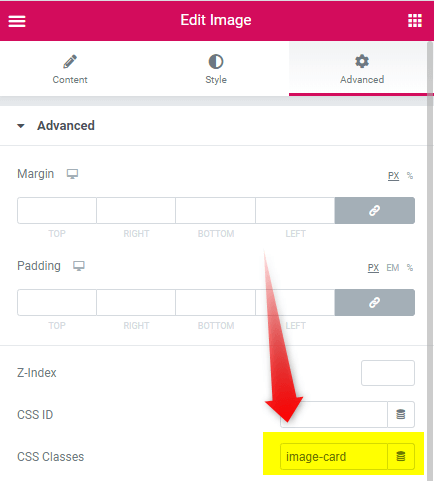
Open Edit Image properties Open the Edit Image toolbox for the image element, then navigate to the Advanced tab. In the Advanced tab, set the CSS class to “image-card.”
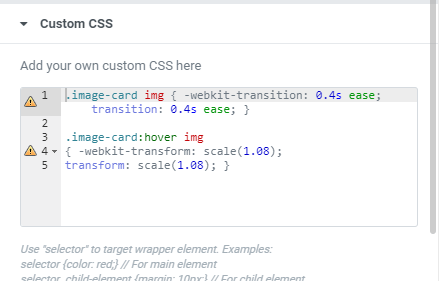
Next, scroll down to the Custom CSS tab and enter the following CSS code.
Here’s how the zoom look like:
Method 2: Elementor Image zoom without overflow
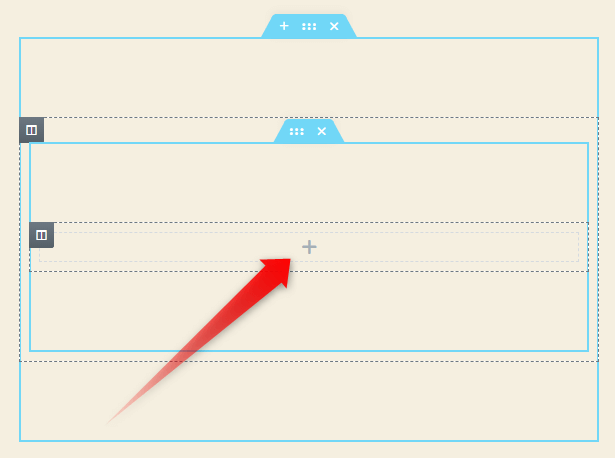
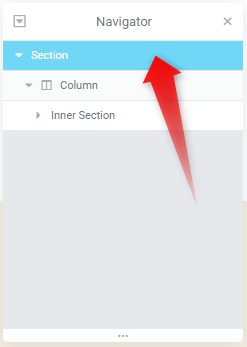
Step 1: Place the Image inside an Inner Section
Insert the image element into the inner section indicated by the red pointer.
“Want to learn a new skill in graphic designing using Canva and more?
Unlock your creative potential with easy-to-follow tutorials and tips!
Step 2: Open Edit Image properties Access the Edit Image toolbox for the image element and navigate to the Advanced tab. In the Advanced tab, update the CSS class to “image-card.”
Next, open the Custom CSS tab below and input the following CSS code.
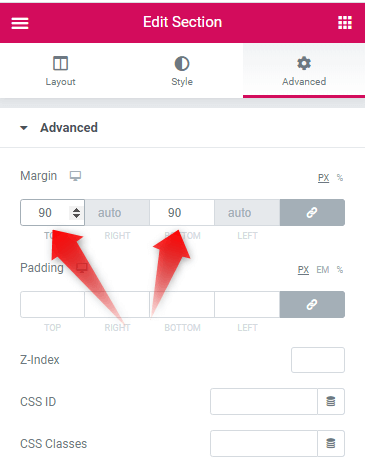
Step 3: Open the Edit Section Toolbox
In the Advanced tab, adjust the Top and Bottom margins to 90 or set a value that best fits your website’s design.
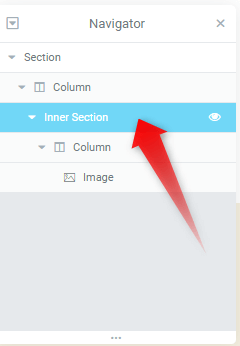
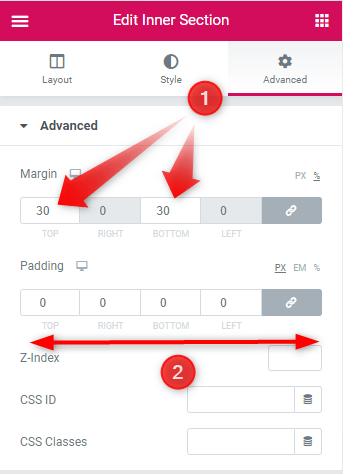
Step 4: Open the Edit Inner Section Toolbox
Open the Elementor navigator toolbox to access the inner section settings. Clicking on the inner section tab will automatically open the edit inner section toolbox on the right.
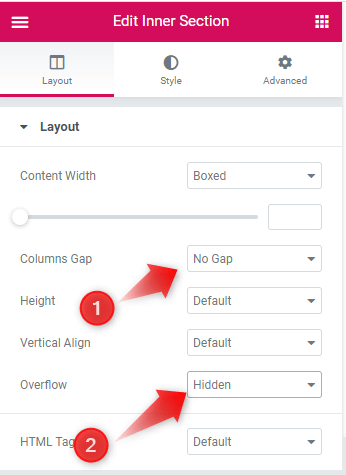
In the Layout tab, set the Column Gap attribute to “No Gap”
Adjust the Overflow attribute to “Hidden.”
In the Advanced tab, set the margin to 30 or choose a value that suits your website’s design.
Remove all padding from the inner section by setting the values to 0.
Here’s how the zoom looks like:
Conclusion: Great! You now know two methods for adding a zoom effect to images in Elementor. These techniques will help you create professional-looking websites with ease.
“Want to learn a new skill in graphic designing using Canva and more?
Unlock your creative potential with easy-to-follow tutorials and tips!