How to Add Google Translate in WordPress

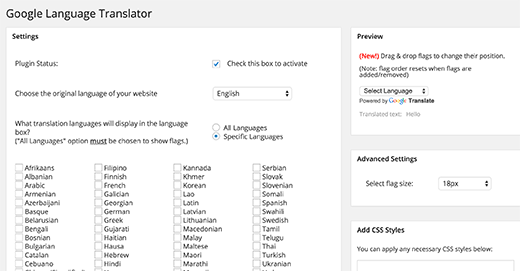
Ensure that the checkbox next to “plugin status” is checked. Then, select your website’s default language and the languages you want to be available for translation. Once you’ve made your selections, save your plugin settings.
Next, go to Appearance » Widgets. Drag and drop the ‘Google Language Translator’ widget into your blog’s sidebar.
Save your widget and preview the Google translator on your website.
Google Translate not only allows users to read a translated version of your website but also lets them contribute to improving translations. Readers can suggest improvements to the machine translations provided by Google. With a good reader base, your entire website could potentially be translated by volunteers.
We hope this article helped you add Google Translate to your WordPress website. While Google Chrome automatically offers a translate option when it detects a different language, other browsers do not. Do you think webmasters should provide translation tools on their websites, or should they rely on users to access translated versions on their own? Let us know in the comments below.

